










Brown petals usually mean one thing: your flower got too hot, stayed too wet, or both. If I want to avoid scorch marks in a microwave flower press, I keep the first burst short, vent steam after each round, replace damp liners, and stop heating as soon as petals feel papery instead of brittle.
Here’s the short version:
- I start most flowers at 20 to 30 seconds, not longer.
- I use 5 to 15 second follow-up bursts.
- I open the press between every cycle so steam can escape.
- I trim thick bases, stems, and crowded inner petals before pressing.
- I stop microwave drying at the first sign of brown spots, a cooked smell, or crispy edges.
- If the bloom is almost dry, I finish it under light weight instead of adding more heat.
A few signs tell me what’s going wrong:
- Dark, crisp brown spots = overheating
- Browning with a soft or cool center = trapped moisture
- Outer petals dry, center still damp = bloom is too thick for the cycle length
One timing rule matters most: after the first round, the risk of scorching goes up. That’s why later bursts should be shorter. In many cases, cutting follow-up time to 5 to 10 seconds is enough to avoid damage.
| Flower type | Starting time | What I check | Next step |
|---|---|---|---|
| Thin petals or small leaves | 20–25 sec | Papery feel | 5–10 sec only if needed |
| Medium blooms | 25–30 sec | Flexible center | 10–15 sec bursts |
| Thick or layered blooms | ~30 sec | Damp base or center | 15 sec bursts, vent each time |
| Large blossoms | ~30 sec after trimming | Even drying | Multiple short bursts with full cooling |
Bottom line: I get better color when I use short cycles, full cooling, dry liners, and flatter blooms. If browning starts, I stop right away and switch from heat to pressure. This technique is part of the microwave flower pressing process that delivers fast, vibrant results.
How to Press Flowers in Minutes (Microwavable Flower Press Tutorial - Microfleur)
sbb-itb-80d8183
How to prepare flowers to reduce scorching
Prep flowers before the first cycle to help cut down on browning.
Start with dry, fresh blooms and remove bulky parts
Pick fresh blooms with no damage or discoloration. Small flaws tend to stand out even more after pressing.
If a flower has any surface moisture, gently blot it dry before pressing. Then check the bloom’s shape and thickness. Thick stems and flower bases hold moisture, and that trapped moisture can turn to steam in the microwave, which often leads to browning. Trim those parts back before you begin.
Some flowers need a bit more prep to lie flat. With multi-layered blooms like daffodils, remove petals that won’t be visible once the flower is flattened and press those on their own. For trumpet-shaped flowers, cut off the long base and open the bloom flat. Thick flowers like tulips can be sliced in half lengthwise so you get two flatter pieces that press more evenly.
Flatten petals and space blooms so steam can escape
How you place the flowers matters just as much as how you trim them.
Leave a little room between blooms so they don’t stick together or hold in moisture, which can lead to browning. Lay each bloom flat, either face-up or on its side, and make sure petals aren’t folded over one another. That overlap can trap heat and moisture in all the wrong places.
Place cotton liners on both sides of the flowers to pull moisture away as the heat builds. If the liners wrinkle, lightly mist them and smooth them out so they sit evenly against the petals.
Prepare the press pads and choose the right press size
Use a press size that fits the bloom so heat and moisture can move out evenly. If you’re using new press pads, prime them before the first use by following the manufacturer’s directions.
Once the bloom is trimmed and arranged, match the cycle to the flower’s thickness.
Match microwave timing to bloom thickness
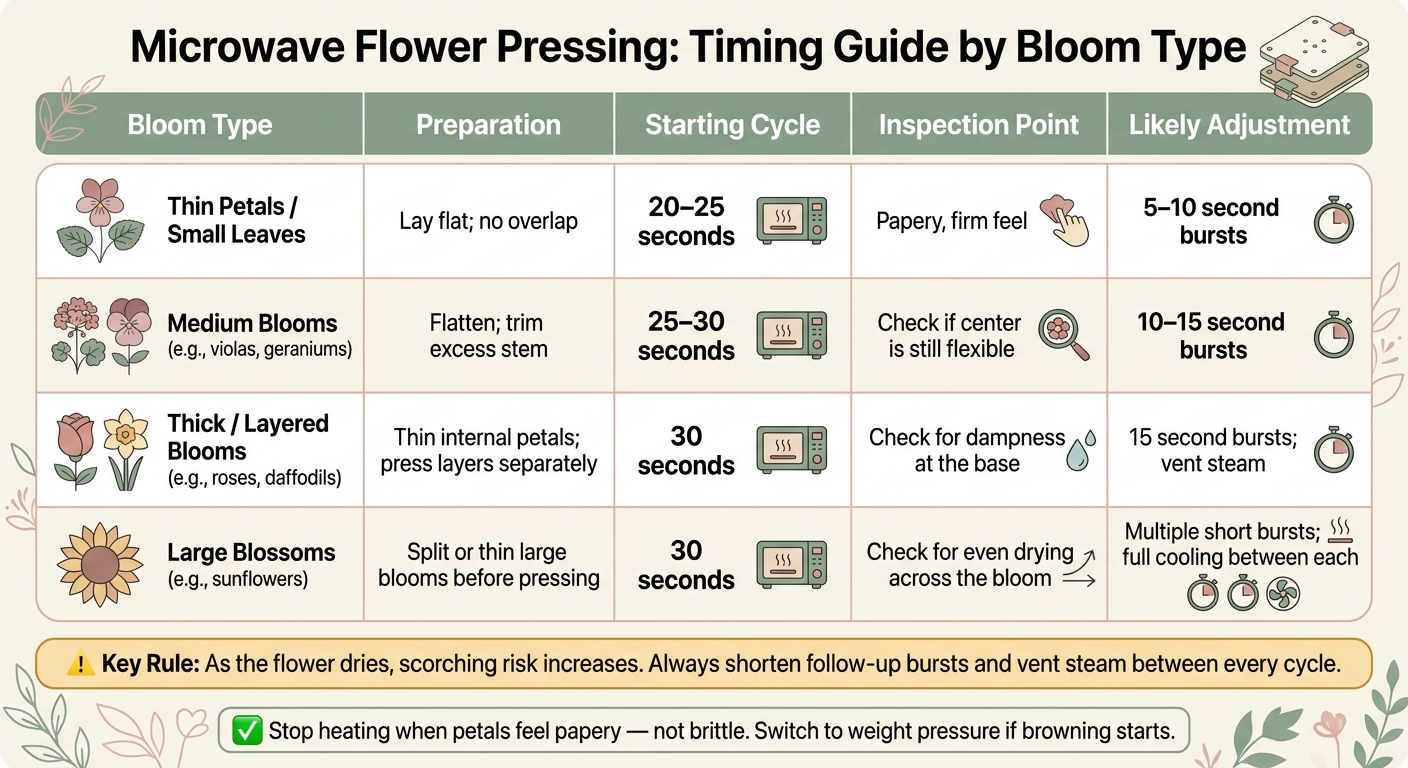
Microwave Flower Pressing: Timing Guide by Bloom Type
Once the bloom is flat and trimmed, timing becomes your main control. It decides whether the petals dry out nicely or end up scorched. Microwave wattage, moisture in the flower, and bloom thickness all shape the result. The aim is simple: use enough heat to pull out moisture without burning the petals.
Start with a 25-second burst for most flowers. Then open the press, let steam escape, and allow both the press and the flowers to cool between bursts.
As the flower dries, it gets easier to scorch. That’s why the next rounds should be shorter. Use 5- to 15-second follow-up bursts and check after each one. Stop when the petals feel papery and firm, not brittle.
Use shorter cycles for thin petals and small leaves
Thin material, like violet petals or small leaves, dries fast. A 20- to 25-second first burst is usually enough to get started. After that, check often and use 5- to 10-second follow-up bursts only if needed.
Check the center first when pressing medium and thick blooms
Thicker or layered blooms, like roses and daffodils, don’t always dry evenly. The outer petals may seem done while the center still holds moisture.
Between cycles, open the press and lightly check the center of the bloom with your fingertip. If the center still bends or feels cool, add 15 seconds or less, then vent the steam.
Timing by Bloom Thickness
Use these ranges as a starting point, then adjust based on your microwave wattage and how much moisture is still in the flower.
| Bloom Type | Preparation | Starting Cycle | Inspection Point | Likely Adjustment |
|---|---|---|---|---|
| Thin petals / small leaves | Lay flat; no overlap | 20–25 seconds | Papery, firm feel | 5–10 second bursts |
| Medium blooms (e.g., violas, geraniums) | Flatten; trim excess stem | 25–30 seconds | Check if center is still flexible | 10–15 second bursts |
| Thick / layered blooms (e.g., roses, daffodils) | Thin internal petals; press layers separately | 30 seconds | Check for dampness at the base | 15 second bursts; vent steam |
| Large blossoms (e.g., sunflowers) | Split or thin large blooms before pressing | 30 seconds | Check for even drying across the bloom | Multiple short bursts; full cooling between each |
Next, manage moisture between bursts to stop browning as the flower dries.
Control moisture and fix browning during the pressing cycle
If your first few cycles leave damp centers or hot spots, this is the point where you reset the press.
Moisture stuck inside the press can turn drying into cooking fast. Each short burst of heat makes more steam, and if that steam has nowhere to go, it gets pushed right back into the flower.
Open the press between cycles and replace damp liners
After each burst, open the press and let the steam out. While it's open, check the flower for dryness and flatness. If the press pads feel damp, switch them out for dry ones or let them dry before the next cycle.
Steps to follow when petals start browning
The second you see browning, stop the microwave. Don't try to squeeze in one more burst. Let the press cool all the way before opening it again.
If the flower is mostly dry but the center still feels soft, use one very short burst of 5 to 10 seconds. If even one petal scorches, stop heating and save what's left of the bloom.
When the bloom is mostly dry but still a little soft, finish it using traditional pressing methods under gentle weight instead of adding more microwave heat. Same idea if it still needs a bit more drying: use weight, not more heat.
Once the flower is fully dry, move to cooling and storage to help protect its color.
Finish, store, and protect color after pressing
After the final burst, stop the heat and let the press cool ALL the way.
Let flowers cool fully before handling or framing
Leave the flower inside the closed press until it’s fully cool and dry so it stays flat. Before you take it out, check the center and base for any cool spots or soft areas. Then lift the bloom with fine nylon tweezers or clean, dry hands.
Once the flower is cool and flat, move it to storage.
Store pressed flowers in dry, low-light conditions
Keep finished flowers in a dry, low-light spot so they hold their color and don’t pull moisture back in. Make sure they’re fully dry before sealing them in resin or placing them in frames. Even a little leftover moisture can lead to browning or mold over time.
Microfleur supplies and learning resources for consistent results
If you’re doing batch after batch, wash or replace the liners before the next round when they get stained or start holding pollen. If the liners wrinkle, iron them flat before you use them again. Microfleur refill packs can help keep the press consistent from one session to the next.
Conclusion: The main fixes for brown petals
Brown petals usually happen for three simple reasons: too much moisture, too much heat, or not enough cooling time between microwave bursts. Start there first.
Begin with the flower itself, then tighten up your timing with these flower pressing tips for beginners. Thick or layered flowers like roses, daffodils, and tulips may need you to remove hidden petals or cut the bloom in half. Keep the first microwave burst short, about 25 to 30 seconds, then add 5- to 15-second bursts only if needed. As Microfleur notes, press time that runs too long is the main cause of brown petals, pads, and liners.
Between cycles, open the press, let the steam out, and swap damp liners before the next burst.
It also helps to test on a spare bloom first, so you don't risk your favorites. When that test flower comes out looking right, follow the same routine for the rest of the batch. Get those basics in place - dry blooms, short bursts, cooling between bursts, and fresh liners - and you should see far fewer brown petals.
FAQs
Can I save flowers after browning starts?
Usually not. Once a flower starts to turn brown, that color change usually won't go away. And if the flower has marks or damage while it's fresh, those flaws will still show up after pressing.
To help avoid browning, start with fresh, high-quality flowers and handle them with care from the garden to your Microfleur press. It also helps to use the right drying steps for blooms that hold a lot of moisture, and to test your timing with imperfect flowers first.
Which flowers are hardest to microwave press?
The hardest flowers to microwave press are usually thick blooms, flowers with a lot of moisture, and flowers with many layers of petals. Roses, marsh marigolds, and brown-eyed Susans can be especially tricky.
Flowers with lots of layers tend to be harder to press because they’re thicker from the start. One simple fix is to remove some petals that won’t show once the flower is flattened. That can make the process go much more smoothly.
How do I know when liners need replacing?
Replace cotton lawn liners when they’re stained or when they’re holding pollen that could carry over into later batches. Permanent stains are normal and won’t hurt future pressings, but pollen buildup can affect color purity.
To get more life out of them, you can hand-wash and dry the liners. If they still look soiled after cleaning, or if they’re damaged, swap them out.





















