










Fresh flowers are lovely while they last, but a bouquet from a wedding, anniversary, or garden harvest fades quickly. Pressing flowers lets you keep those memories for years, and microwave flower pressing makes the process almost instant. Instead of waiting weeks for a traditional press to do its slow work, you can dry and press flowers in minutes using your microwave. The results are fast, simple, and beautifully colored, which is why so many hobbyist crafters have made this method their go-to for resin jewelry, scrapbooking, journaling, and framed art.
The idea may sound too good to be true, but it really works. Microwaveable presses extract moisture rapidly, which speeds up the entire preservation process. A typical pressing session can take just a couple of minutes from start to finish, and you can check your progress between bursts. Whether you are preserving a single sentimental bloom or pressing a whole garden harvest, microwave flower pressing is a fun, low-commitment way to create professional-looking material for your next project.
Why Press Flowers in the Microwave?
Traditional flower pressing has been around for centuries, and it still has its place. Wooden presses tightened slowly with wing nuts produce lovely results, but they ask for patience. Most traditional methods take weeks before your flowers are ready to use. Microwave flower pressing changes that timeline dramatically. You can go from fresh blossom to pressed flower in minutes, which makes it ideal for last-minute gifts, spontaneous craft sessions, and preserving blooms before they begin to wilt.
Color is another big reason crafters love this method. Because the flowers dry so quickly, they tend to hold onto their natural brightness better than blooms that sit in a press for weeks. The brand behind this approach, Microfleur, built its whole philosophy around fast drying with strong color retention. Their microwave press kits are designed to simplify the preservation process, so even a beginner can create beautiful pressed flowers in just minutes in the microwave.
There is also a practical side to speed. Fresh flowers are perishable, and every hour they sit unpressed is a little more color lost. When you press in the microwave, you can handle flowers the same day they are picked or received. That means fewer wilted petals, less disappointment, and more of your favorite blooms making it into your finished craft.
How Microwave Flower Pressing Works
Microwave flower pressing relies on heat and moisture removal. When a flower is placed inside a microwave-safe press, the microwave energy warms the plant material and encourages the moisture inside the petals to evaporate quickly. The press holds the flower flat while this happens, so the bloom dries into a thin, papery shape instead of curling up. Because the moisture is removed so rapidly, the flower keeps more of its original color and structure.
A purpose-built microwave press kit takes the guesswork out of this process. It typically uses washable absorbent cloth layers and reusable components that are made to be microwaved safely. You simply arrange your flowers between the layers, close the press, and microwave at the recommended power. The kit does the flattening and moisture absorption for you, which is why it is so popular with beginners who want reliable results on the first try.
What You Need for Microwave Flower Pressing
One of the best things about microwave flower pressing is how little equipment it requires. You can start with items you already have in your kitchen, then upgrade to a dedicated press kit when you are ready.
For the Paper Towel and Plate Method
-
Two microwave-safe plates
-
Paper towels, folded once or twice
-
Fresh flowers or leaves
-
A microwave with a power setting you can adjust
This is the most accessible way to begin. If you are curious about microwave flower pressing but not ready to buy special equipment, the plate method is a perfect starting point.
For a Microwave Flower Press Kit
-
A microwave flower press kit, such as the Microfleur Max or Regular size
-
Fresh flowers or leaves
-
A microwave
-
Tweezers (optional), if you want to handle delicate petals with extra care
A press kit is a small investment that makes the process much more consistent. The absorbent cloth layers are designed to wick moisture away evenly, and the press itself keeps flowers flat without the need to balance plates. Many crafters find that a kit gives them results that look almost professional, even on their very first attempt.
Method One: Pressing Flowers with Paper Towels and Plates
This simple DIY method is a favorite among crafters who want quick results without buying anything new. Start by folding a paper towel or two and placing it in your microwave. Arrange your flowers on top, then decide how you want them to lie. You can squash your flowers face-down or place them face-up, and it is worth trying it different ways to see which look you prefer. Some blooms press more evenly when face-down, while others hold their shape better face-up.
Once your flowers are arranged, cover them with another layer of paper towel and set the plates on top to create gentle pressure. Microwave the whole stack at 50% power for 30 seconds at a time, checking the flowers after each interval. Most flowers take 2 minutes or less to dry completely. If you prefer a single longer burst, you can microwave at half power for 90 seconds, then remove the dish and check. The flowers should feel quite dry, almost like paper, when they are ready.
Step-by-Step for the Paper Towel Method
-
Fold a paper towel or two and lay it on a microwave-safe plate.
-
Place your chosen flowers on top, arranged face-down or face-up as you prefer.
-
Cover the flowers with another folded paper towel.
-
Set a second microwave-safe plate on top to apply gentle, even pressure.
-
Microwave at 50% power for 30 seconds at a time, checking between bursts.
-
Continue until the flowers feel dry and papery, which usually happens within 2 minutes.
-
Let the flowers cool completely before handling or using them.
Cooling is an important step that many beginners skip. Flowers that come out of the microwave are warm and slightly fragile, so they need a moment to firm up. Let flowers cool before using, and you will find they hold their shape much better in your craft projects.
Method Two: Using a Microwave Flower Press Kit
If you plan to press flowers regularly, a microwave flower press kit is worth considering. These kits simplify the preservation process, ensuring you can create beautiful pressed flowers in just minutes in the microwave. The Microfleur press, for example, comes in a 9-inch Max size and a 5-inch Regular size, so you can choose the capacity that matches your projects. Both use washable absorbent cloth and reusable components, which means you will not be constantly buying disposable supplies.
Using a kit is wonderfully straightforward. Open the press, place a layer of absorbent cloth down, arrange your flowers on top, and cover them with another layer of cloth. Close the press and microwave according to the kit instructions. Because the press is designed specifically for microwave use, it distributes heat and pressure evenly across every flower, which leads to more consistent results than the plate method.
Why Choose a Press Kit?
Press kits are ideal for crafters who want professional-quality pressed flowers without the trial and error. The absorbent cloth layers pull moisture away from the petals efficiently, while the rigid press keeps everything flat and uniform. Reusable components also make the kit economical over time, and the washable cloth means you can use it again and again for all your pressing projects. For anyone planning to make pressed flower art, resin jewelry, or handmade cards in quantity, a kit quickly pays for itself.
Tips for Press Kit Success
-
Arrange flowers so they are not overlapping, which helps each one dry evenly.
-
Check your flowers between every short burst and touch them all over.
-
Let pressed flowers cool completely before removing them from the press.
-
Store finished pressed flowers in a dry place until you are ready to craft with them.

Creative Ways to Use Microwave Pressed Flowers
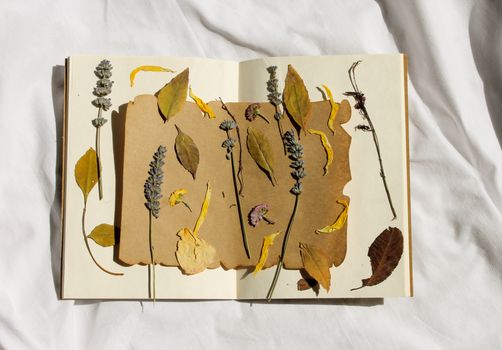
Once you have a stash of beautifully pressed blooms, the crafting possibilities are nearly endless. Microwave pressed flowers work wonderfully in resin jewelry, where their bright colors shine through clear resin. You can also use them in scrapbooking and journaling to add a personal, botanical touch to your pages. Framed pressed flower art makes a lovely gift, and pressed flowers add a delicate handmade detail to cards, gift tags, and bookmarks.
Because microwave pressing is so quick, you can produce pressed flowers in small batches whenever inspiration strikes. Press a few blooms from a garden harvest in the morning, and by lunchtime you can be arranging them in a frame or pouring resin. The speed makes it easy to experiment with color palettes and layouts before committing to a final design.
Choosing Flowers for Microwave Pressing
Most flowers respond well to microwave pressing, and the quick process makes experimentation easy. Some crafters find that squashing flowers face-down gives a fuller look, while others prefer the classic face-up position. Try it different ways and see what works for the particular blooms you have on hand. Since most flowers take 2 minutes or less, you can test a handful of varieties in a single sitting without a big time commitment.
Sunflowers are a popular choice for pressing projects, and dedicated tutorials exist specifically for them. Their large, cheerful faces make striking pressed art, and their sturdy petals hold up well during the drying process. Whatever you choose, look for fresh blooms that are not already wilting or browning. The better the flower looks when it goes into the microwave, the better it will look when it comes out.
Traditional Pressing vs. Microwave Pressing
Both traditional and microwave pressing have loyal fans, and the right choice depends on your goals. Traditional wooden presses have been used for centuries, and professional flower artists often advocate for the slow, patient approach. It is a time-honored technique with a proven track record, but it requires weeks of waiting and careful attention to pressure. Microwave flower pressing, on the other hand, offers speed and convenience that traditional methods simply cannot match.
|
Comparison |
Traditional Pressing |
Microwave Pressing |
|---|---|---|
|
Time to results |
Weeks of waiting |
Minutes, often 2 or less |
|
Equipment |
Wooden press tightened with wing nuts |
Microwave press kit or plates with paper towels |
|
Moisture removal |
Slow, gradual drying |
Rapid moisture extraction |
|
Best for |
Traditionalists and patient crafters |
Beginners, quick projects, and color retention |
Neither method is right or wrong. Some crafters use traditional pressing for projects where they enjoy the slow, meditative process, and microwave pressing when they need fast results. Many hobbyists find that microwave flower pressing becomes their everyday method, with the traditional press reserved for special projects. If you are new to flower pressing, starting with the microwave is a fun, low-commitment way to learn the basics and see immediate results.

Troubleshooting Tips for Beautiful Results
Even though microwave flower pressing is fast, a few small adjustments can make a big difference in your final results. Keep these tips in mind as you practice.
-
Watch the strength of your microwave, which can scorch delicate petals. Every microwave is different.
-
Check flowers after every burst, since drying times vary by flower size and thickness.
-
Let flowers cool completely before touching them, as warm petals are more fragile.
-
Press flowers shortly after picking or receiving them for the brightest color.
-
Do not overcrowd the press or plate, because flowers that overlap may dry unevenly or stick together.
-
If a flower still feels damp, return it to the microwave for another shorter burst rather than using it while wet.
With practice, you will develop a feel for how different flowers respond. Thin-petaled blooms may dry almost instantly, while thicker flowers might need 2 minutes (always done in short bursts) or slightly longer. The joy of microwave pressing is that you can see the results right away, adjust your technique, and try again without losing weeks to the learning curve.
Frequently Asked Questions
Does pressing flowers in the microwave work?
Yes. Microwaveable presses extract moisture rapidly, which speeds up the entire process. Most flowers dry in 2 minutes or less and they should come out feeling quite dry, almost like paper. Many crafters use this method for resin jewelry, journaling, and framed art because it delivers beautiful results in a fraction of the time traditional pressing requires.
How do you make a microwave flower press?
You can make a simple version at home with plates and paper towels. Fold a paper towel or two and place it in the microwave, lay your flowers on top, then microwave at 50% power for 30 seconds at a time, checking between bursts. Most flowers take 2 minutes or less. A microwave flower press kit is the easiest alternative, with reusable components made for the job.
What flowers are good for microwave pressing?
The best approach is to experiment with different blooms and arrangements. Try squashing your flowers face-down or placing them another way to see what gives the look you like. Most flowers take 2 minutes or less, so testing a few varieties is quick. Sunflowers are a favorite for pressing projects, and dedicated tutorials are available for getting them right.
How long do microwave pressed flowers last?
Pressed flowers are meant to last far longer than fresh blooms, which is the whole point of preserving them. The key is making sure each flower is completely dry, almost like paper, before you use it. Once pressed, keep finished pieces dry and handle them gently. Specific timelines can vary, so check the instructions that come with your press kit or course.
Microwave flower pressing opens up a world of creative possibility for crafters who love working with botanicals. Whether you choose the simple plate and paper towel method or invest in a dedicated press kit, you will be amazed at how quickly fresh blooms become flat, colorful, ready-to-use pressed flowers. With a little practice and a few short microwave sessions, you will have a beautiful collection of preserved flowers ready for resin, paper, and frame.





















