










If your pressed flowers crack, the cause is usually simple: too much microwave heat, not enough cooling time, damp liners, thick blooms, or rough handling.
I’d check these 8 fixes first:
- Shorten heat rounds to 25–30 seconds, then add 10–20 seconds only if needed
- Let the press cool between rounds before checking the flower
- Swap damp pads or liners for dry ones
- Use thinner, undamaged blooms or petals
- Lift flowers out slowly instead of pulling them up fast
- Give petals support and space so they don’t tear
- Repress with dry paper instead of blasting with more heat
- Store flowers flat, dry, and out of light
A small timing change can ruin a batch. Mastering microwave flower pressing requires precision. In a 1,000W microwave, drying may take about 1 minute 20 seconds to 4 minutes, and even 10 extra seconds can turn a flower from dry to scorched.
Quick comparison
| Problem | What I’d look for | What I’d do |
|---|---|---|
| Overheating | Brown color, powdery feel, crumbling petals | Cut heating time |
| Not fully dry | Soft or flexible flower | Use another short round after cooling |
| Damp liners | Wet pads, sticking petals, uneven drying | Replace liners and pads |
| Thick blooms | Split petals, wet centers, cracked edges | Thin the flower before pressing |
| Rough removal | Tears during lifting | Peel liner back slowly |
| Bad storage | Cracks later, fading, breakage in transit | Store flat between paper |
Bottom line: I’d fix heat, cooling, and paper first. Those three steps solve most cracking before you need to change anything else.
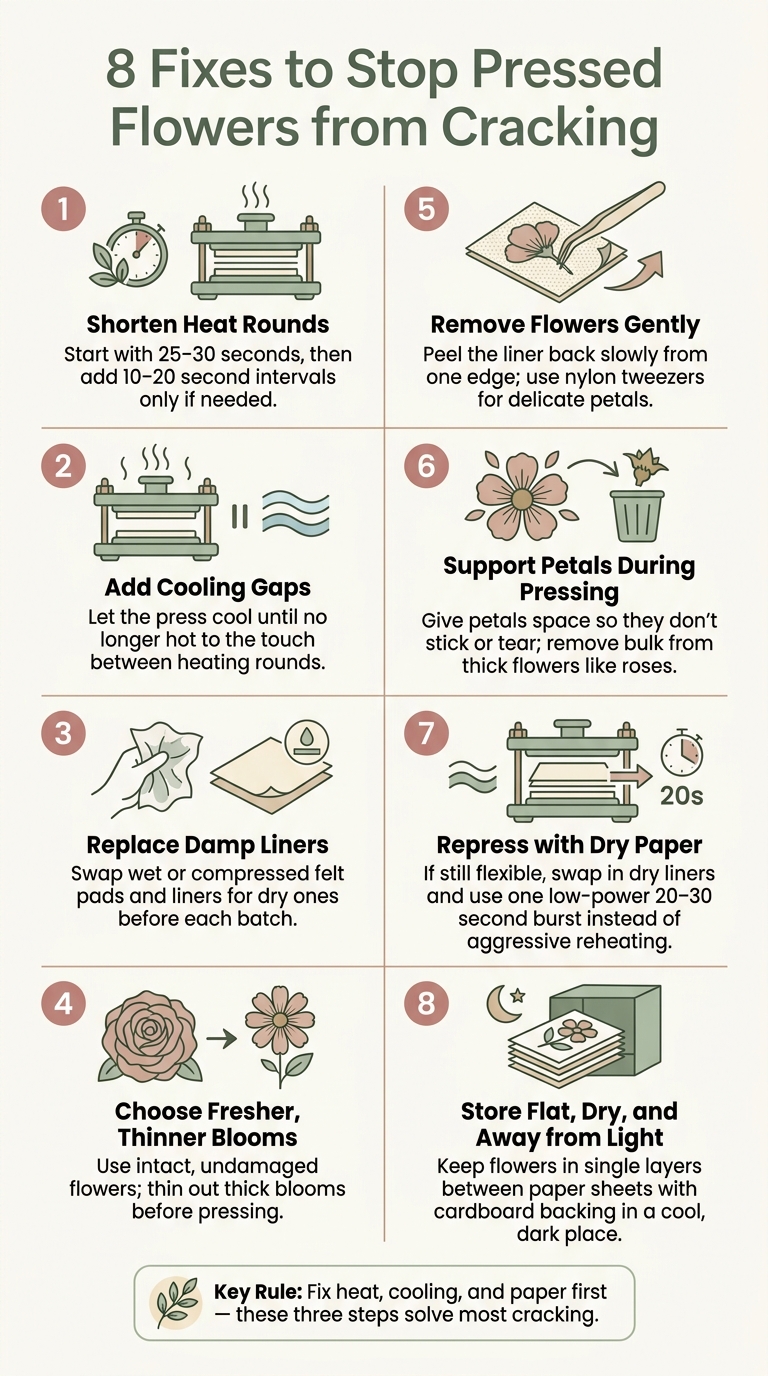
8 Fixes to Stop Pressed Flowers from Cracking
Fixes 1 through 3: Adjust heat, cooling, and paper first
These three fixes are the best place to start. Go through them in order before you change anything else in your process.
Fix 1: Use shorter microwave heating rounds
Keep each burst short. Start with 25–30 seconds, then add 20-second intervals only if the flower still needs more time.
In a 1,000W microwave, total drying time often lands between 1 minute 20 seconds and 4 minutes, based on the flower’s thickness and water content. And here’s the tricky part: even a 10-second change can take a flower from dry to scorched.
Use this table to match what you see with what to do next:
| Drying Status | Texture | Color | Next Step |
|---|---|---|---|
| Still damp | Soft, damp, or limp | Original, but may wilt | Run another 10–20-second burst |
| Ready | Stiff, papery, and flat | Vibrant and true to life | Remove gently and store flat |
| Overheated | Brittle, crumbling, or curled | Browned, faded, or scorched | Discard and reduce time for next batch |
If the flower still feels soft, don’t judge it by heat alone. Cooling time matters just as much.
Fix 2: Add cooling gaps between heating rounds
Let the press cool until it’s no longer hot to the touch before you check dryness or run another burst.
That pause gives the moisture time to settle, which makes it easier to tell whether the flower is still damp or actually done. If you check too soon, it’s easy to misread what’s happening.
If drying still looks uneven after that, the next thing to inspect is the pads and liners.
Fix 3: Replace damp or compressed paper
Even with good timing, damp pads can throw everything off. Worn pads and liners absorb moisture unevenly, so flowers are more likely to dry unevenly. That can lead to cracking or curling.
Check the pads and liners before each batch:
- Dampness: If the felt pads or liners feel wet, swap them for dry ones.
- Discoloration: Brown scorching or heavy pollen staining is a sign to wash or replace the liners.
- Moisture around stems: If water is pooling around thick stems, give that spot extra attention.
- Petals sticking: If petals stick to the liners, peel them back gently. Replace the liners if they’re too worn.
Put in fresh pads and liners before the next batch.
sbb-itb-80d8183
Fixes 4 through 6: Prevent breakage during pressing and removal
Once your heat setting and paper setup are working, the next trouble spot is usually prep and handling. That’s where flowers tend to split, snap, or fall apart. These fixes help protect delicate petals and bulky blooms before, during, and after pressing.
Fix 4: Choose fresher, less fragile flower parts
If a flower still cracks after drying, the issue may be the bloom itself. Frail or bulky blooms usually fail first, so it helps to start with clean, intact, thinner pieces.
Use the freshest blooms you can find, and skip any with bruised edges, torn petals, or visible cracks. Small flaws in fresh flowers often look worse after pressing. Also, only press blooms that are fully dry.
If a flower is thick, thin it out before pressing. That can mean:
- removing hidden petals from layered flowers
- splitting thick flowers like tulips
- trimming heavy stems and extra foliage
Once the bloom is prepped, the next point where damage often happens is when you open the press.
Fix 5: Remove flowers more gently
Wait until the flower is flat and dry before lifting it out. Then peel the liner back slowly from one edge instead of pulling the flower straight up.
For small or delicate petals, use nylon crafting tweezers. They help reduce damage from finger oils and rough handling.
After removal, the next step is making sure petals stay supported and don’t pull apart during pressing.
Fix 6: Support petals before they separate
Give flowers space so they don’t stick to each other and tear.
With thick blooms like roses, it often helps to remove most of the petals before pressing. Then press a thin layer of petals instead. Less bulk gives the petals more support and lowers the chance of breakage during removal.
Fixes 7 and 8: Repress carefully and store flowers flat
Once you've finished the prep work and removed the flower, you're not quite done yet. Two things can still lead to cracking at this stage: trying to finish a flower that's still damp, and storing a dry flower the wrong way.
Fix 7: Repress with dry paper instead of reheating aggressively
If a flower still feels flexible after removal, dry it fully before putting it away. In many cases, changing out damp felt pads and liners for dry ones helps more than putting the flower through another microwave cycle.
Here’s how to judge what to do next:
- Still flexible: Replace the liners with dry ones and use one low-power burst for 20–30 seconds.
- Dry but fragile: Stop heating. More heat can make it crack.
- Brown and powdery: The flower was overheated and can't be recovered.
Fix 8: Store pressed flowers flat, dry, and away from light
Once the flower is fully dry, store it flat so it doesn't crack later. Keep flowers in single layers between sheets of paper with cardboard behind them for support. Put them in a cool, dry, dark place.
If you need to move them, use tweezers. That helps prevent skin oils from getting on the petals and cuts down on accidental damage to delicate flowers.
Closing checklist: 8 ways to stop pressed flowers from cracking
Most cracking comes down to three things: too much heat, damp liners, or handling that's a little too rough. And sometimes, let's be honest, a petal is past saving. If it’s burned or dried out all the way, there’s not much you can do.
Here’s a simple checklist for beginners that matches each problem with the fix:
| # | Fix | What it prevents |
|---|---|---|
| 1 | Use 25–30 second bursts, then 20-second intervals | Overheating and brittle petals |
| 2 | Add cooling gaps between rounds | Heat buildup and brittle texture |
| 3 | Replace damp or compressed liners | Uneven drying |
| 4 | Pick fresh, flawless flower parts | Starting with flaws already in the flower |
| 5 | Remove flowers gently from liners | Mechanical breakage after drying |
| 6 | Support petals before they separate | Petals splitting during removal |
| 7 | Repress with dry paper instead of reheating aggressively | Burning nearly dry flowers |
| 8 | Store pressed flowers flat, dry, and away from light | Post-press cracking and fading |
Short bursts, cooling gaps, dry liners, careful handling, and flat storage stop most cracking before it starts.
FAQs
Can cracked pressed flowers be saved?
Often, yes. If you want to avoid extra damage, use shorter heating bursts and let the press cool all the way down between rounds.
If the bloom is thick, press the petals one by one and put the flower back together later. Once the flowers are dry, store them in a cool, dry spot, like a box or sealed bag, to help preserve them.
Which flowers crack most easily?
Thicker flowers, such as roses, are the hardest to press and the most likely to crack. Because they have more bulk, they can become fragile during the pressing process.
To help prevent cracking, handle them gently, remove individual petals if needed, and use shorter heating bursts with cooling breaks between sessions.
How do I know when a flower is fully dry?
A flower is fully dry when it looks flat and feels dry to the touch.
Because microwave power varies, heat in short rounds, then let the flowers rest before checking them again. Keep going until they reach that point.
It also helps to test a few imperfect flowers first. That way, you can figure out the right timing for your microwave before pressing your best blooms.





















