










My rule for clean pressed flower cards: dry flowers first, tiny glue dots second, flat storage last. I check that the thickest flower centers feel papery - not damp - before attaching anything.
I use this checklist to keep petals secure and cardstock flat:
- Prep and press: Choose thin, blemish-free flowers, such as pansies or violas. Follow the microwave press instructions, and dry or replace damp liners.
- Plan and glue: Arrange flowers on clean cardstock before gluing. Use tweezers and small dots of PVA, keeping petals clear of the fold, similar to the process for a DIY simple pressed flower card.
- Dry and protect: Let glue dry completely. Sealing is optional; if used, apply a thin coat to the flowers and let it dry.
- Check and pack: Secure loose edges, check that the card closes, and store it flat in a cool, dry, dark place. For mailing, add rigid support and room around the petals.
<u>I don’t pack the card until the flowers, glue, and any sealer are fully dry.</u>
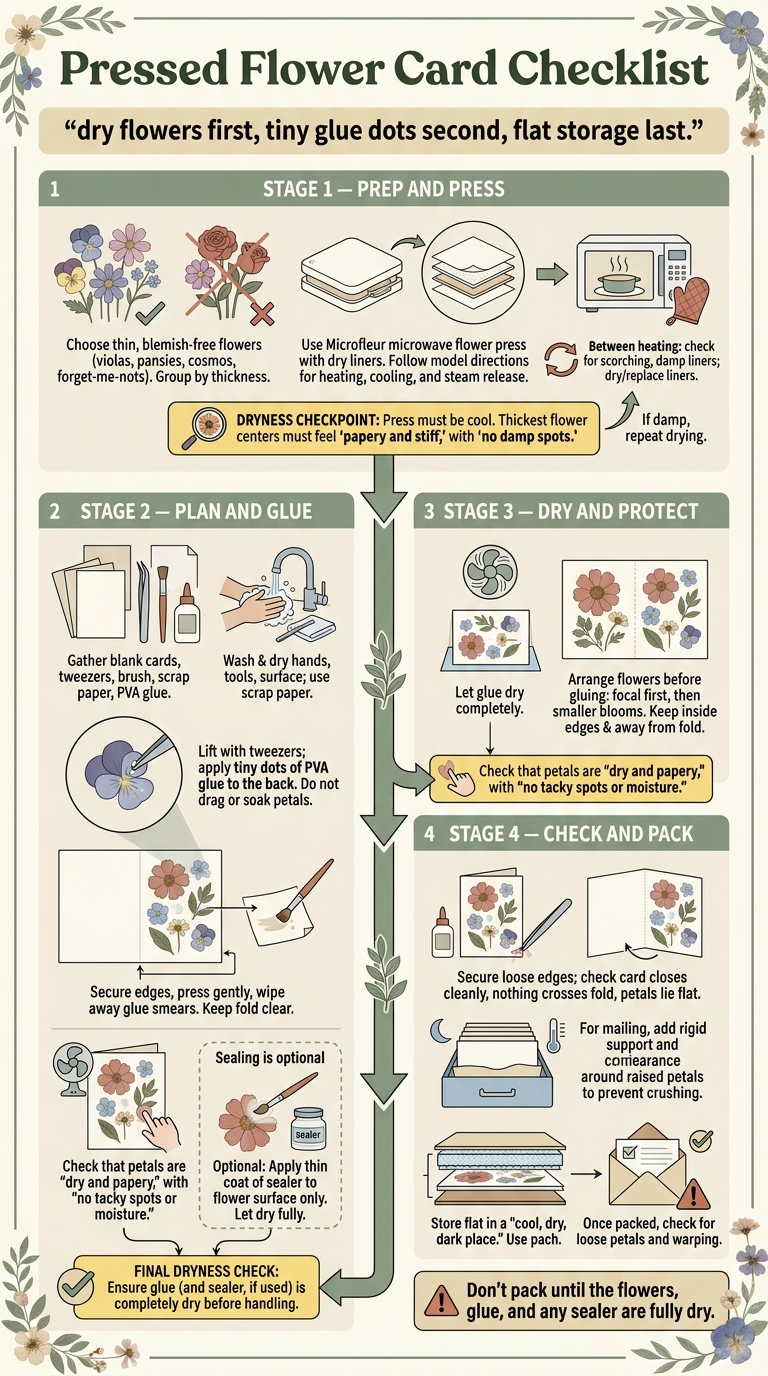
Pressed Flower Card Checklist
Prepare and Press Flowers
Choosing and Preparing Flowers for Pressing
Choose thin blooms, such as violas, pansies, cosmos, and forget-me-nots. Group flowers by thickness to help them press evenly.
Follow the Microwave Press Instructions
Use a purpose-built microwave flower press from Microfleur with dry, metal-free liners.
Arrange the flowers between the supplied liners. Follow your model’s directions rather than a fixed heating time. Check its instructions for microwave compatibility, power settings, heating intervals, cooling, oven mitts, and safe steam release.
Between heating intervals, check for scorching, condensation, and damp liners. Dry or replace damp liners before continuing.
Once the flowers pass the dryness check below, move on to the card layout. You can even create a 3D butterfly card for a more dynamic design.
Check That Flowers Are Fully Dry
Let the press cool fully, then check the thickest flower centers. Continue drying until the flowers feel papery and stiff, with no damp spots.
sbb-itb-80d8183
Make a Card Using Pressed Flowers
Set Up and Assemble the Card
Let the flowers dry fully after choosing and preparing them before arranging them on the card. Plan the layout before adding glue.
Gather Tools and Arrange the Design
Set out blank cards, craft tweezers, a small brush, scrap paper, and PVA glue.
Wash and dry your hands, tools, and work surface. Place scrap paper beneath the area where you’ll apply glue to catch stray adhesive.
Arrange the flowers without glue first. Start with the focal flower, then add smaller blooms and foliage. Keep everything inside the card edges and away from the fold, leaving room for your message. This process is one of many simple tips for beginners to ensure a professional finish.
Glue Flowers and Secure Loose Edges
Lift each flower with tweezers. Use the brush to apply small dots of glue to the back, then set the flower in place without dragging it or soaking the petals.
Tuck a little glue under any lifted petals or stems and press gently. Wipe away visible glue smears.
Dry, Seal, and Protect the Card
Let Glue Dry, Then Seal
Let the assembled card rest until the glue dries. Before sealing, check that the petals feel dry and papery by following these flower pressing tips, with no tacky spots or moisture.
If you choose to seal the flowers, use a small watercolor brush to apply a thin coat of sealant only to the flower surface for UV and moisture protection. Let the sealer dry fully before handling or packaging the card.
Store Cards Flat and Pack for Mailing
Store finished cards flat in a cool, dry, dark place. Place parchment between stacked cards, and handle each card by its edges or with craft tweezers.
For mailing, add rigid support to keep the card flat and preserve the flowers’ height. Leave enough clearance around the three-dimensional design so it won’t get crushed in transit.
Once the card is packed, check for loose petals and any warping.
Conclusion: Check the Finished Card
Once the card is dry and sealed, give it a final check before packing. Make sure it closes cleanly and nothing crosses the fold. The petals should lie flat without catching when you handle the card.
If you spot a loose edge, lift it with tweezers and add a tiny dot of PVA to the back.
Before mailing or storing the card, check that the flowers, glue, and sealer are fully dry. Keep it flat in a cool, dry, dark place.
FAQs
How can I prevent cardstock from warping?
Use adhesive sparingly during assembly. Whether you’re using glue sticks, runner dots, double-sided tape, or white glue, apply only a tiny amount - and avoid excess wet glue. If you finish your card with a sealant or adhesive, use a light, thin coat to protect the paper.
Choose high-quality, heavy-duty cardstock for a sturdy base that resists curling or bending when you decorate it with pressed flowers.
How do I choose a flower-safe sealant?
Choose a sealant that protects against moisture and UV light and stays flexible. Pick a matte or gloss finish, depending on the look you prefer. For delicate pressed flowers sent through the mail, an archival-safe, water-resistant, flexible sealant is ideal.
Always test the sealant on a less precious pressed flower first to check that you like the finished look.
Why do pressed flowers fade over time?
Pressed flowers fade mainly when exposed to moisture, sunlight, and air. To help keep their color and extend shelf life, store finished cards in a cool, dry, dark place.
A sealant, such as an archival-safe, UV-resistant adhesive, helps protect the flowers from UV light and moisture. Drying flowers fast with a Microfleur microwave flower press also helps preserve their natural pigments and lowers the risk of browning or mold.





















