










If I were starting my first flower resin pendant, I’d pick a silicone mold. It usually means fewer spills, less edge cleanup, and an easier release at the end. I’d use a metal bezel only if I wanted that framed jewelry look and didn’t mind more setup.
Here’s the short answer:
- Silicone molds are easier for most beginners
- Metal bezels give a framed look but need more care
- In both methods, flowers must be 100% dry or they can turn brown
- Thin layers help with bubbles, overflow, and dark wet spots on petals
- The main trouble points are bubbles, tacky resin, and overfilling
A few details matter more than people think. In bezels, I need to watch the rim closely because resin can creep over the edge. In molds, I still need to work in layers, but the cavity does more of the shaping for me. And with either method, checking bubbles early - about every 15 to 30 minutes during settling - can save the piece.
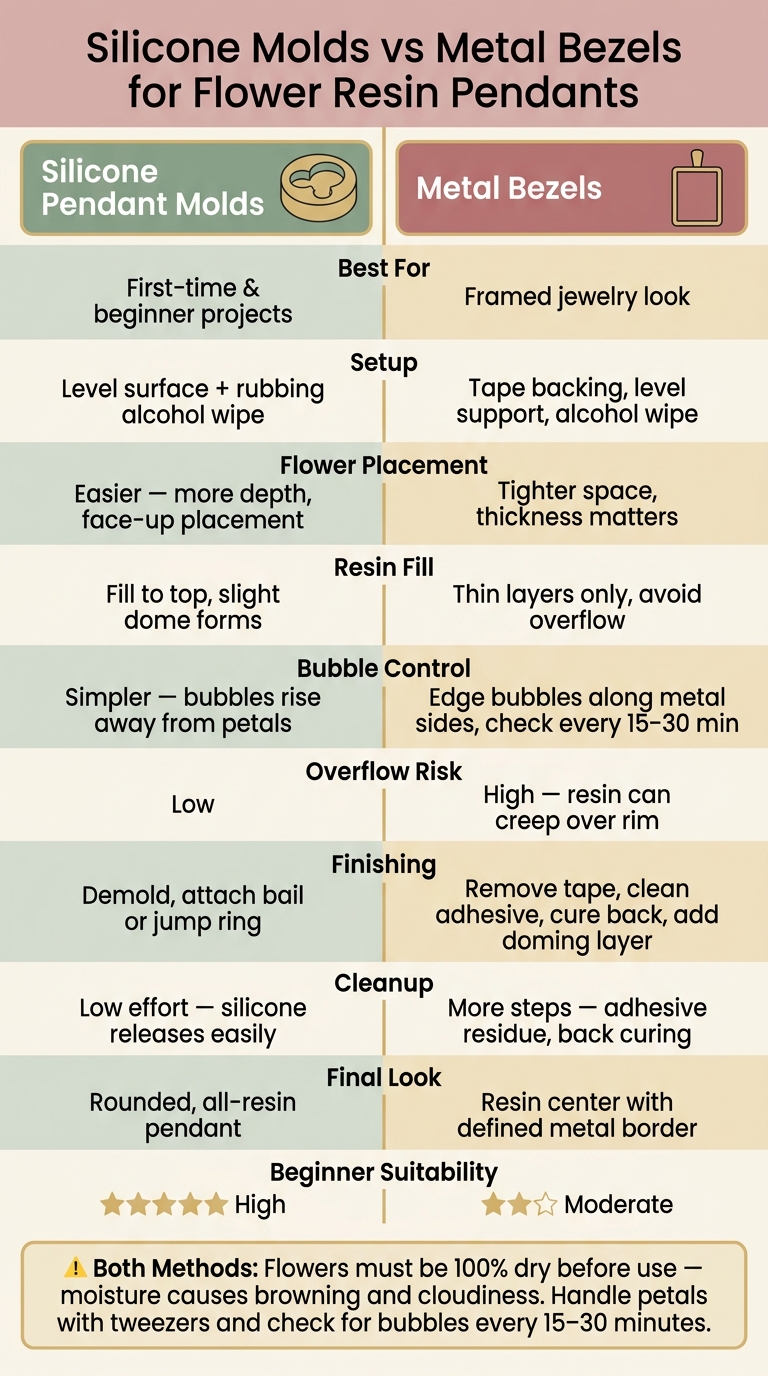
Silicone Molds vs Metal Bezels for Flower Resin Pendants
Your HOW-TO Guide for using RESIN in OPEN BEZELS - Jewelry Making +
sbb-itb-80d8183
Quick Comparison
| Criteria | Silicone Pendant Molds | Metal Bezels |
|---|---|---|
| Best for | First-time projects | Framed pendant look |
| Setup | Flat surface and clean mold | Clean bezel, tape backing, keep level |
| Flower placement | Easier due to more depth | Tighter space, less room for error |
| Resin fill | Fill to the top with a slight dome | Thin layers to avoid spillover |
| Bubble control | Simpler overall | More edge bubbles along metal sides |
| Finishing | Demold, then add hardware | Remove tape, clean adhesive, cure back |
| Cleanup | Lower effort | More cleanup steps |
| Final look | Rounded, all-resin pendant | Resin center with metal border |
So if I want the easier path, I’d go with molds. If I want the metal frame to stay part of the design, I’d go with bezels.
Silicone pendant molds: setup, layering, and release
Silicone molds handle the shape for you, so your job is simpler: keep the layers clean and the bubbles under control. Set the mold on a level surface with a drop cloth underneath, then wipe the cavity with rubbing alcohol. Before you start, lay out your tweezers, toothpicks, mixing cups, a heat gun or lighter, and pressed flowers.
Flower placement and resin fill inside the mold cavity
Start with a thin base layer of resin - just enough to coat the bottom. This helps keep the flowers from floating later. Let that layer cure, then add a very thin layer of clear resin to act as a placement bed for the flowers.
Use tweezers to place the flowers face-up in the mold. That small detail makes a big difference. It helps trapped air move up and away from the petals instead of getting stuck underneath. Press the flowers in gently. If you push too hard, the petals can develop dark, wet-looking spots. It’s better to build the pendant in several thin layers than to do one thick pour.
After each pour, pass a heat gun or lighter over the surface for a moment to release bubbles. Use toothpicks to guide resin into tight corners or nudge a petal back where it belongs. Fill the mold just above the rim so the top forms a slight dome.
Finishing, cleanup, and how molds help beginners
When the resin is fully cured, check the surface for tackiness before demolding. Make sure it has cured all the way through, since timing depends on the resin. If the surface still feels tacky, add a thin top coat and cure it again.
To remove the piece, gently peel the silicone away from the resin. If it sticks, a little soapy water around the edges can help it release. You can lightly sand any uneven spots, then attach a bail or jump ring after demolding.
| Feature | Silicone Pendant Molds |
|---|---|
| Setup | Level surface, drop cloth, and a rubbing alcohol wipe |
| Flower positioning | Flowers placed face-up into a thin cured base layer |
| Shape control | Mold cavity defines the shape; resin can dome slightly at the top |
| Finishing work | Check for tackiness, then add a bail or jump ring after demolding |
| Cleanup | Silicone releases cured resin easily; soapy water helps with stubborn spots |
| Beginner suitability | High - forgiving release and simple cleanup make them beginner-friendly |
The next method uses the same resin, but the shallow frame changes how you place flowers and control the fill.
Metal bezels: framed look, careful filling, and edge control
A metal bezel isn't like a silicone mold. It stays in the finished pendant, so it acts as both the frame and the hardware. That changes the whole process: you get less depth to work with, tighter edges, more cleanup, and a neater border at the end.
Start by wiping the bezel with rubbing alcohol to remove oil or dust. If you're using an open-backed bezel, press it down firmly onto a strip of packing tape to seal the bottom. If the hanging loop makes the bezel tilt, put the tape over a piece of cardboard first so the bezel stays level.
Working within a shallow metal frame
Metal bezels give you almost no extra room. Before you pour anything, make sure the pressed flower sits below the rim. In shallow bezels, flower thickness can make or break the fit.
A simple way to handle this is:
- Use a toothpick to brush a thin first coat into the corners
- Set the flower in place with tweezers
- Cure it briefly before adding more resin
During the first settling stage, check the edges every 15–30 minutes. Bubbles can creep up along the metal border, and this is the best time to catch them. Also, don't pour all the way to the rim at once. Build up thin layers instead, and let the surface tension create a slight dome above the edge.
Finishing, cleanup, and the tradeoff in control
After the resin is fully cured, peel away the tape, clean off any adhesive residue, and cure the back directly. That's worth doing carefully because leftover adhesive can leave a cloudy film that shows through the piece.
Then add one last thin doming layer to the front. This helps smooth out small ripples and gives the surface a polished, glossy look.
| Feature | Metal Bezel |
|---|---|
| Depth control | Limited by shallow metal walls; requires very thin pours |
| Overflow risk | High; resin can creep over the rim if overfilled |
| Backing requirements | Open-backed styles need temporary packing tape and a level support surface |
| Finishing work | Tape removal, adhesive cleanup, back curing, and a final doming layer |
| Finished appearance | Framed, polished edge |
Metal bezels ask for more care during filling and cleanup. The payoff is a clean, framed look that's hard to get any other way. Those tradeoffs stand out even more when you compare setup, placement, fill, and finish side by side.
Side-by-side comparison: setup, placement, fill, and final look
The biggest differences show up right at setup. A silicone mold needs a flat, level surface. A metal bezel takes a bit more prep: tape the back, then make sure the edge is clean and sealed. That simple shift changes how easy each method feels from the start.
Flower placement is close in both methods. In each case, begin with a thin anchor layer so the bloom stays in place during the main pour. Where things split is depth and edge control. Deep molds make it easier to place flowers face-up, which helps bubbles move up and away from the petals. Bezels are more shallow, so the flower’s thickness matters more. Press too hard, and you can leave wet spots on the petals.
| Stage | Silicone Pendant Mold | Metal Bezel |
|---|---|---|
| Setup | Level surface; clear silicone lets UV resin cure through the mold | Clean with rubbing alcohol and seal the back with packing tape |
| Flower placement | Place the flower in a thin anchor layer; deep cavities help bubbles rise away from petals | Place the flower in a thin base layer and avoid pressing too hard to protect the petals |
| Resin fill | Fill to the top; surface tension can create a slight dome above the edge | Fill in thin layers and stop before the resin spills past the rim |
| Curing | Use a clear silicone mold so UV light can pass through | Cure the front first, then remove the tape and cure the back |
| Removal | Peel the finished piece out of the mold; the mold is reusable | The metal frame stays as part of the finished piece |
| Finished shape | Dimensional, all-resin shape with a smooth, rounded finish | Flat or slightly domed resin center with a defined metal border |
How the finished pendant looks and feels
These process changes are easiest to spot in the final pendant. Molds give you a rounded, all-resin pendant. Bezels give you a piece with a metal frame around the resin center.
A mold-cast pendant is all resin. The flower is fully sealed inside a smooth, rounded shape, and the resin itself forms the edges. That gives the piece more dimension and a slightly thicker profile.
A bezel pendant has a defined metal border around the resin center, which gives it more of a framed look. The resin sits inside the frame instead of forming the outside shape.
If you want a clean cast look, molds tend to fit that style well. If you want the metal frame to show as part of the design, bezels are often the better pick.
Best choice for beginner projects and final decision
When you stack up setup, fill, finish, and cleanup, the choice comes down to simplicity vs. control.
Silicone molds are the easiest place to start for most beginners: simpler setup, easier release, and less finish work.
Metal bezels are a good fit if you want a framed jewelry look right away and don’t mind dealing with tape on the back, keeping the piece level, and watching for overflow. The upside is more control from the start.
Dry flowers are the other make-or-break part. If there’s moisture left in the petals, it can affect both color and clarity in the finished pendant. No matter which method you use, one rule stays the same: your flowers need to be fully dry before they go into resin. Microfleur's microwave flower press kits dry flowers fast while helping keep more of their color.
A few habits can help a lot with either method:
- Handle petals with tweezers and don’t press down too hard, which can leave dark wet spots.
- Check for bubbles early - a toothpick works for larger ones, and a quick pass of a lighter takes care of tiny surface bubbles.
- Follow cure times all the way through before demolding or removing tape; if the piece still feels tacky or looks concave, add another thin layer before demolding.
Choose molds if you want an easier casting process and less cleanup. Choose bezels if you want a framed look and tighter control.
FAQs
Which option is better for my first resin pendant?
Both silicone molds and metal bezels work well for a first resin pendant. The better pick comes down to the kind of process you want.
Silicone molds tend to be easier for beginners. They’re flexible, which makes the cured resin simpler to remove. Metal bezels give your pendant a clean, polished look and stay in place as the permanent frame, so you can skip the demolding step.
How do I keep flowers from browning in resin?
Make sure flowers are fully dried before you put them in resin. Any moisture left behind can lead to dark spots or patches that look wet inside the piece.
When you place the blooms, handle them with a light touch. Hold the center or the sturdier outer edges instead of the thin petals, which can tear or bend easily. It also helps to brush on a thin coat of resin or sealant first. That extra layer can protect the petals and help the color stay closer to how it looked at the start.
What causes bubbles or tacky resin?
Bubbles usually form when air gets trapped around flower petals, layered pieces, or along the mold’s edges and corners. Flowers placed face-down are often the main trouble spot because air can get stuck deep between the petals, which makes those bubbles much harder to release.
Tacky resin usually points to an incomplete cure or a rough surface issue. If a piece still feels tacky after the first cure, low spots or trapped air may have stopped the resin from setting the way it should. In many cases, a thin final layer of resin can smooth things out and fix the surface.





















