










Most pressed flower tray problems come from five things: moisture, trapped air, too much heat, bad resin curing, or an unlevel mold. If your petals turn brown, your flowers float, or your resin stays cloudy or sticky, I’d check those first.
Here’s the short version:
- Brown, wrinkled, or see-through petals usually mean the flowers were not fully dry before pouring.
- Bubbles under petals come from air trapped in the flower or along the mold surface.
- Floating flowers happen when I pour too much resin at once instead of setting flowers into a thin base layer first.
- Cloudy or tacky resin often points to moisture, poor mixing, blocked UV light, or surface residue.
- Wavy trays usually mean the mold was not level or the top coat cured unevenly.
A few fast checks solve a lot of issues:
- Flowers should feel dry and papery
- The mold should sit on a flat, level surface
- Thin layers help cut heat and shifting
- I should watch the first 15 to 30 minutes for new bubbles
- Thick blooms like roses often need extra drying in the center , which is why many artists prefer microwave flower pressing for speed and consistency.
One detail matters more than most people think: if moisture gets sealed inside resin, the damage often can’t be fixed after curing. That’s why better flower prep usually does more than any post-cure repair.
Below, I break down what each problem looks like, what likely caused it, and what I’d do next.
Brown petals, wrinkled blooms, and other flower damage
Brown or translucent petals after curing
The color and texture of the petals usually tell you what went wrong. In most cases, the cause comes down to moisture, heat, or rough handling.
Browning usually means moisture got trapped inside the flower or the resin got too hot while curing.
If a flower looks fine at first and only darkens after curing, the resin probably overheated during a deep pour. Translucent spots are a different issue. Those usually happen when the petals get pressed during placement, and those pressure marks stay visible after curing.
Wrinkled, collapsed, or distorted flowers
When flowers wrinkle, collapse, or lose their shape, they usually still had moisture inside or weren’t fully flattened before pouring. Dense blooms, like roses and daffodils, often need some of the inner petals removed so they can dry flat.
Thin resin layers tend to cure more evenly. They also help cut down on heat buildup, shifting, and floating.
What can and cannot be repaired
Some damage just can’t be fixed once the resin cures. Severe browning, rot, and petal distortion fall into that category. At that point, the best move is to replace the bloom or redo the tray. Next time, focus on better flower pressing tips for drying, handling, and layering.
| Problem | Fixable After Curing? | Best Next Step |
|---|---|---|
| Brown or rotting petals | No | Replace the flower and make sure it is 100% dry before the next pour |
| Translucent spots from pressure | No | Handle petals gently and avoid pressing on delicate centers |
| Wrinkled or collapsed petals | No | Dry flowers fully and remove inner petals from dense blooms before pressing |
If the flower itself still looks good, the next thing to check is usually bubbles or shifting during the pour.
sbb-itb-80d8183
Bubbles and floating flowers during the pour
Bubbles under petals and throughout the resin
Surface bubbles and trapped petal bubbles need different fixes.
Bubbles under petals usually come from air stuck beneath the flower. After you place the bloom, slide a toothpick under the petal edges and into the mold corners to let that air escape. Wipe the toothpick on a paper towel as you work so you’re not dragging resin around. Then keep an eye on the piece during the first 15 to 30 minutes of curing, since new bubbles can still rise from inside the flower.
Flowers that float, drift, or shift out of place
If the microwave pressed flower is dry but still moves, the issue is timing, not prep.
Floating tends to happen when you place the flower before the resin can hold it where it belongs. In a fully filled mold, there’s nothing for the flower to rest against, so it often lifts and rises to the top.
The fix is a layered pour. Start with a thin base coat, just enough to cover the bottom of the mold, and then wait. With epoxy resin, let that layer reach a tacky stage before placing your flowers with tweezers. With UV resin, a brief UV cure can lock the bloom down. After the flower is set, pour the rest of the resin over it with care. If it shifts before the base layer gels, use a toothpick to nudge it back into place fast and with as little movement as possible.
How to use heat safely for bubble removal
Once the flower is in position, use heat only to remove the last surface bubbles.
Make short, moving passes with a lighter, small torch, or heat gun. If you hold heat in one spot, you can scorch the petals or warp the mold. It also helps to place flowers with the petals facing up when you can, and keep a toothpick nearby for hidden air pockets.
How To Fix Sticky Resin with Joanne
Cloudy resin, sticky spots, and uneven sealing
If the flowers look good but the finish turns dull, tacky, or uneven, the issue is usually the resin itself or the prep work before pouring.
Cloudy resin or a cloudy halo around flowers
Cloudy resin usually means moisture got trapped in the flowers or something on the tray surface interfered with the finish. Dry the flowers all the way before you pour.
Wipe the tray with rubbing alcohol. Also remove any tape adhesive before adding the final top coat. If the tray looks cloudy and still feels tacky, the problem is more likely cure depth than the flowers.
Sticky, soft, or not fully cured resin
Sticky spots usually mean the resin did not cure all the way through. With UV resin, dark pigments or colored molds can block light and leave the center soft.
If the surface is still tacky after curing, give it more cure time. If the finish looks uneven or dips in the center, add a thin clear top coat.
If the resin has cured but still looks wavy, check the mold and your work surface next.
Uneven, wavy, or patchy tray surfaces
Wavy or patchy surfaces usually happen when the mold is not level or the top coat goes on unevenly. Use a small level before pouring, and prop the mold with cardboard if needed so the resin can settle evenly.
UV resin can shrink toward the edges as it cures, which can leave the center low or concave. For small surface flaws after curing, apply a thin clear top coat to smooth ripples and fill low spots. Use a toothpick or craft stick to push resin into corners and small gaps around petal edges before the layer sets.
Quick diagnosis table and next steps
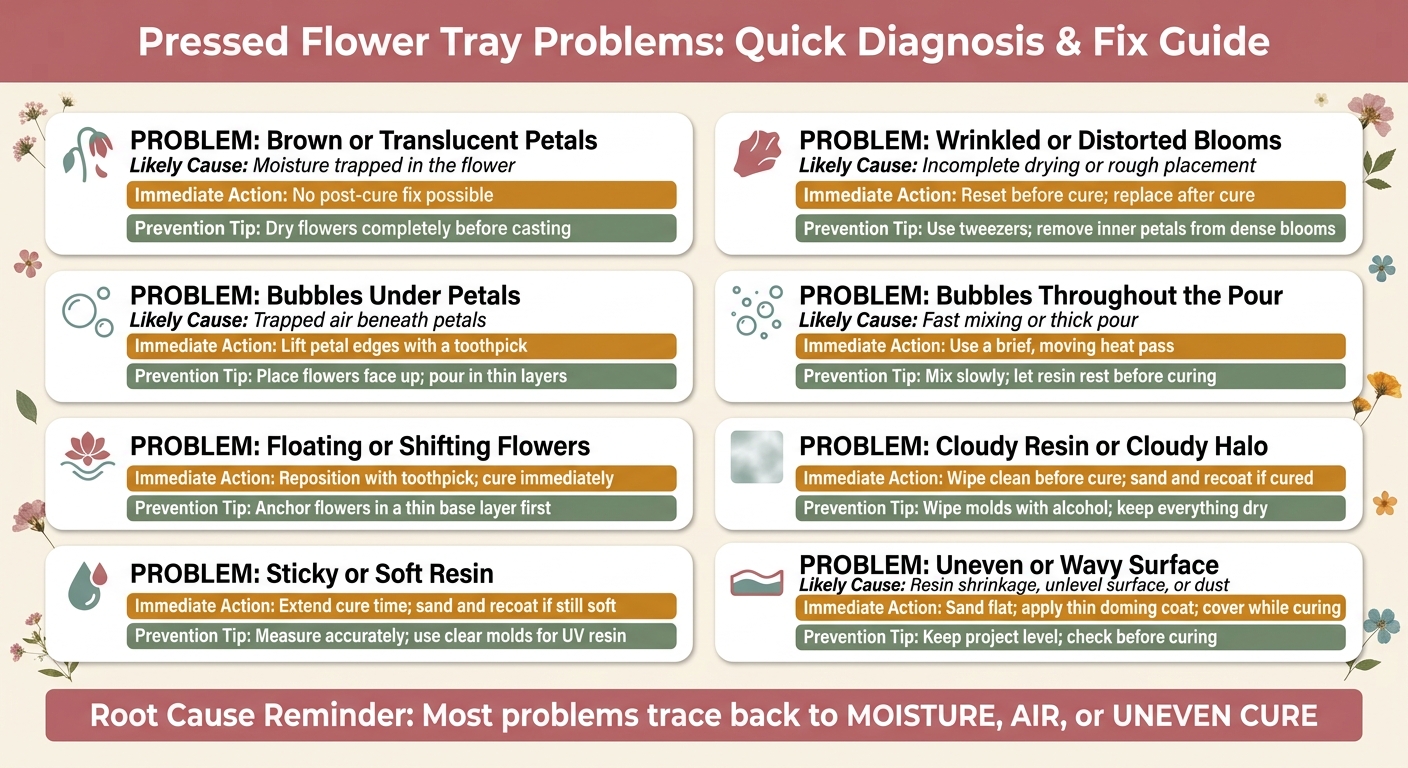
Pressed Flower Tray Problems: Quick Diagnosis & Fix Guide
Problem-to-fix reference table
Use this chart to match each issue with the fastest fix.
| Visible Problem | Likely Cause | Immediate Action | Prevention |
|---|---|---|---|
| Brown or translucent petals | Moisture in the flower | No post-cure fix | Dry flowers completely before casting |
| Wrinkled or distorted blooms | Incomplete drying or rough placement | Reset before cure; replace after cure | Use tweezers; remove inner petals from dense blooms |
| Bubbles under petals | Trapped air beneath petals | Lift edges with a toothpick | Place flowers face up; pour in thin layers |
| Bubbles throughout the pour | Fast mixing or thick pour | Use a brief, moving heat pass | Mix slowly; let resin rest before cure |
| Floating or shifting flowers | Too much resin poured at once | Reposition with a toothpick; cure immediately | Anchor flowers in a thin base layer first |
| Cloudy resin or cloudy halo | Moisture or tape residue | Wipe clean before cure; if cured, sand and recoat | Wipe molds with alcohol before use; keep everything dry |
| Sticky or soft resin | Wrong mix ratio or blocked UV light | Extend cure if the mix was correct; sand and recoat if it stays soft | Measure accurately; use clear molds for UV resin |
| Uneven or wavy surface | Resin shrinkage, unlevel surface, or dust settling during cure | Sand flat; apply a thin doming coat; cover the project while curing | Keep the project level; check before curing |
If the chart doesn’t solve the issue, it usually comes back to the same three troublemakers: moisture, air, or uneven cure.
Key takeaways for better trays next time
Most tray problems come from three things: flowers that weren’t fully dry, resin mixed the wrong way, or layers poured too thick.
The big one is moisture. Flowers need to be completely dry - not almost dry. If water gets sealed inside cured resin, that problem can’t be fixed later. One way to cut drying time is microwave pressing with Microfleur, which can bring it down to 1.5 to 3 minutes instead of days or weeks with air drying or silica gel.
One safety note: always follow the instructions on your resin label for gloves, ventilation, and any heat use. If the label says heat is okay for bubble removal, use only a quick moving pass. Leaving heat in one spot can scorch the resin or warp the mold.
FAQs
How dry should flowers be before resin?
Flowers should be completely dry before you apply resin.
For Microfleur resin projects, check that your pressed flowers have no leftover moisture or residue. Resin and water don’t mix, and even a small amount of material left behind can make the finished piece look cloudy.
Can sticky resin be saved?
Yes, you can often save sticky resin.
If the surface feels tacky or the piece looks a bit concave after curing, add one more thin layer of resin.
With UV resin, the underside may stay sticky if it didn’t get direct light. In that case, cure it again under the UV lamp.
Sometimes the problem isn’t the resin at all. It’s tape residue. If that’s what’s causing the stickiness, gently wash the piece with soapy water or lift the residue off with a toothpick. Then let the piece dry all the way before you add any final layers.
Why do flowers brown in resin?
Flowers often turn brown or lose color in resin when they aren’t fully dry before you pour. Any moisture left inside the petals can lead to discoloration or even rot once it reacts with the resin.
Be gentle when placing delicate petals in the tray too. If you poke or press them too hard, you can end up with dark spots or patches that look wet. Using a Microfleur flower press can help you dry flowers more thoroughly before you start.





















