










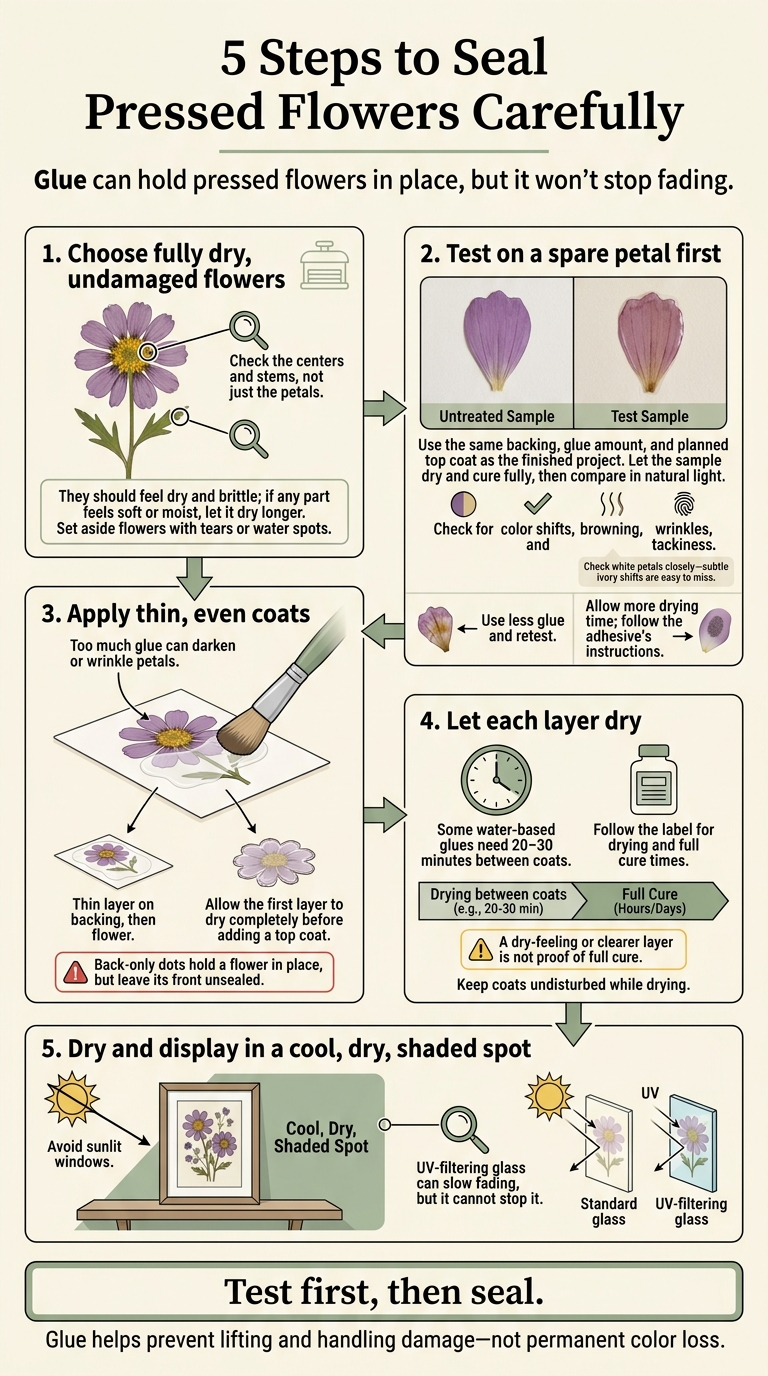
Glue can hold pressed flowers in place, but it won’t stop fading. I use thin coats and keep pieces out of direct sunlight to limit color changes and damage.
Here’s my five-step checklist:
- Choose fully dry, undamaged flowers. Check the centers and stems, not just the petals.
- Apply thin, even coats. Too much glue can darken or wrinkle petals.
- Let each layer dry. Some water-based glues need 20–30 minutes between coats; I follow the label for drying and full cure times.
- Dry and display in a cool, dry, shaded spot. UV-filtering glass can slow fading, but it cannot stop it.
- Test on a spare petal first. I use the same backing and glue amount, then check for color shifts, wrinkles, and tackiness before sealing the project.
My rule: <u>test first, then seal</u>. If the sample changes color, I use less glue and retest. Back-only dots may hold a flower in place, but they leave its front unsealed.
5 Steps to Seal Pressed Flowers Carefully
Gather Flowers, Glue, and Tools
Start with thin blooms that are fully pressed and dry, plus a few spare petals to test your glue.
Suitable blooms include pansies, violas, cosmos, or daisies.
Choose a clear-drying PVA craft glue or a decoupage medium, which can work as both glue and sealer.
Use a soft, fine-bristle brush to apply the glue and precision tweezers to lift fragile flowers. Cover a clean, flat workspace with parchment paper to catch spills.
Read the label for application steps, timing between coats, and full cure time. Even clear glue can change petal color, so don’t judge it by appearance alone. Use your spare petals to test the glue before sealing the full project.
sbb-itb-80d8183
1. Choose Fully Dry, Undamaged Flowers
Check flower quality and preparation before sealing. The centers and stems - not just the petals - must feel dry and brittle. If any part feels soft or moist, let it dry longer. Trapped moisture can cause mold and brown discoloration.
Pick flowers that lie flat, and set aside any with tears or water spots. To adjust petals, gently move them with a toothpick rather than pressing them down.
Microfleur microwave flower presses dry flowers quickly, helping preserve their color before sealing. Even so, check every flower for complete dryness, especially its center. For thick blooms, separate the petals and press them individually so they can dry fully. Once the flowers are fully dry, apply the thinnest glue coat possible.
2. Apply Thin, Even Glue Coats
Once the flowers are dry, use a soft, fine brush to apply a thin, even coat of glue. Keep it light: thick, wet layers can soak the petals, cause wrinkles, and leave ridges.
Lay out your design before applying glue. Then brush a thin layer of decoupage medium onto the backing and place the flowers into it. This helps keep them from shifting while the glue is wet.
For fragile cosmos or poppy petals, use minimal glue on the back and add only small dabs between layers.
A spot of glue holds a flower in place, but it doesn't fully seal it. Let the first layer dry completely before adding a top coat to keep the flowers from lifting.
3. Let Each Glue Layer Dry Completely
Thin coats protect color only when each layer cures fully. Follow the adhesive’s drying and curing times rather than relying on a timer alone. Even if a layer feels dry, it may need more time before you stack, mount, or frame the piece.
Water-based glues typically need 20–30 minutes before a top coat.
If the flowers are face-down, they should become easier to see through the glue as it dries. That’s a sign of progress, not a full cure. Thicker coats take longer to cure.
Leave each coat undisturbed and keep the piece in the shade while it cures. Turning it or adding another coat too soon can smear the glue, shift the flowers, or weaken the finish.
4. Dry and Display Away From Direct Sunlight
After each glue layer cures, pay attention to where you dry, store, and display the piece. Choose a cool, dry, shaded spot for drying. Dried petals can absorb moisture from humid air, causing them to soften or turn brown. For those just starting out, following simple tips for beginners can help ensure your first projects stay vibrant.
For long-term display, choose an interior wall or another shaded spot away from windows.
UV-filtering glass or acrylic can slow fading, but it won’t stop it. Pair it with shaded placement rather than using it as a substitute for shade.
5. Test Glue on a Spare Petal First
Before sealing the full piece, test the glue on a spare petal from your microwave flower press. Match the test to your finished project: use the same surface, position the petal with fine-point tweezers, and apply the coat thickness you plan to use. You’ll see whether the glue changes color before applying it to the full design.
Planning to add a top coat? Test that too. Let the test layer dry and cure fully before judging the finish.
Compare the sample with an untreated petal in natural light. Check for browning, wrinkles, tackiness, color shifts, and a clear, wet look. If you’re using clear acrylic, inspect the front side too. Check white petals closely - subtle ivory shifts are easy to miss. Use the sample to adjust coat thickness before sealing the final piece.
Read Test Results and Adjust Glue Use
Let your test results guide the next adjustment. Petal thickness and sensitivity can change how each flower reacts to glue.
| Sample result | Possible issue | Recommended adjustment |
|---|---|---|
| Darkening or transparency | Possible saturation or petal sensitivity | Reduce coverage or use back-only dots, then retest. |
| Visible glue or ridges | Possible excess glue or uneven application | Apply a thinner, more even coat. |
| Wrinkling | Possible moisture sensitivity | Use less glue and retest. |
| Tackiness | Possible incomplete drying | Allow more drying time and follow the adhesive’s instructions. |
| Clear surface with no visible color shift | Promising compatibility | Repeat the tested method with care. |
Place back-only dots on sturdier parts of the flower, not delicate edges. These dots hold the flower in place, but they don’t fully seal its surface. The front stays unprotected by a glue coating.
For Mod Podge, 20–30 minutes between coats can be a starting point. Follow your formula’s instructions, and wait longer if the sample still feels tacky.
Once a test works, use the same brush, application pressure, and glue amount on your pressed flower project. Apply small dabs instead of pouring glue directly onto the flowers so you can control how much goes on.
Conclusion: Seal Carefully to Limit Color Changes
Use fully dry, undamaged flowers and apply thin coats of glue. Let each coat dry completely, keep the flowers in the shade, and test the glue on a spare petal first.
Glue helps prevent lifting and damage from handling, but it won’t stop fading or keep the original color forever. White petals may still turn ivory or cream.
FAQs
Can I fix petals that darken after sealing?
Yes, but only if you catch the problem early and adjust your process. Make sure the flowers are completely dry before sealing. Any moisture left behind can cause discoloration. Apply a thin coat, let it dry, then add another.
Color may still change over time, so keep finished pieces out of harsh sunlight. Test a small sample using the same flower and your exact sealant. If browning continues, remake the piece.
Should I seal both sides of pressed flowers?
The right approach depends on your project. For bookmarks, apply a base coat of adhesive to attach the flowers, then a top coat to protect the exposed surface. For resin jewelry, seal the flowers with a thin coat before embedding them to help prevent translucency or color loss.
Make sure the flowers are completely dry before sealing. Any remaining moisture can cause rot or curing problems.
How should I store flowers before sealing?
Make sure flowers are completely dry before sealing. They should feel brittle and papery - not flexible or springy. Trapped moisture can lead to rot, fading, or problems with the sealant. Keep dried flowers in an airtight container so they don’t absorb moisture.
When you’re ready to work, gently handle the flowers with fine tweezers or toothpicks. This keeps finger oils off the petals and helps prevent pressure marks on delicate surfaces.





















