










If I want flowers built into the sheet, I pick pulp. If I want exact placement and less drying time, I pick glue.
Here’s the short answer: both methods work, but they solve different problems. Pulp gives me a handmade look with petals mixed into the paper, while glue keeps flowers on top, with more control over layout and a smoother area to write around.
Before I start, I keep three facts in mind:
- Flowers must be fully dry or I risk browning, mold, warping, or soggy pulp
- Pulp paper usually takes 24–48 hours to dry
- Glued flowers often set in about 20–30 minutes, but the adhesive still needs extra time to cure
What I compare in this guide:
- Appearance
- Texture
- Writing surface
- Drying time
- Placement control
- Best use
Quick Comparison
| Method | Best for | Surface | Writing | Drying |
|---|---|---|---|---|
| Flowers in pulp | Handmade sheets, tags, note cards | Petals sit inside the paper | Better with finely blended petals | 24–48 hours |
| Flowers glued on paper | Cards, bookmarks, exact layouts | Flowers sit on top and feel raised | Write in open spaces only | 20–30 minutes to dry; longer to cure |
So if you’re choosing between the two, I’d keep it simple: pick pulp for an embedded paper look, and pick glue for control, detail, and a smoother base.
Making Handmade Paper with Flower Petals [DIY Tutorial]
sbb-itb-80d8183
Method 1: Adding Flowers to Handmade Paper Pulp
Start by blending recycled paper with water until it turns into pulp. Then add fully dried botanicals near the end of blending so they hold their shape instead of disappearing into the mix. A good approach is to blend half the flowers briefly, then pulse in the rest. That way, the finished sheet gets both fine flecks and bigger petal pieces.
After that, form the sheet, press out the water, and make pressed flower paper by letting it dry flat. This method changes more than just the look. It also affects how the paper feels in your hand.
| Step | What You Need |
|---|---|
| Pulp preparation | Torn recycled paper, water, blender |
| Sheet formation | Plastic basin, mold and deckle |
| Water removal | Sponge, absorbent sheets |
| Drying | Flat surface, 24–48 hours to dry |
| Botanicals | Fully dried flower petals or leaves |
How Pulp-Embedded Flowers Look and Feel
The finished paper looks soft and organic. Instead of sitting on the surface, the botanicals become part of the sheet, so the petals seem woven into the fibers.
Texture comes down to how much you blend. A finer mix gives you a smoother, more even sheet. Bigger petal pieces make the surface more textured, with light bumps and natural variation. Thin petals, such as sweet peas, blend especially well.
Writing Surface, Drying Time, and Best Uses
You can write on pulp-embedded paper, but it works best when the botanicals are blended finely. Larger pieces add more texture, which makes this a better pick for decorative projects than for a page that needs to feel smooth.
Drying usually takes 24 to 48 hours, based on sheet thickness and humidity. Thicker sheets or damp air can stretch that closer to the 48-hour mark.
This method works especially well for deckled-edge bookmarks, gift tags, and botanical note cards where that embedded, handmade look is the whole point. If you want neater flower placement and a smoother writing surface, the glue method is the better fit.
Method 2: Gluing Pressed Flowers Onto Finished Paper
If pulp puts flowers inside the sheet, glue leaves them on the surface. Start by arranging the dried flowers before you add any adhesive. That way, you can lock in the design before anything starts to set. Use tweezers to move the flowers around, since pressed flowers are very fragile. Proper flower preparation is key to ensuring they don't crumble during handling.
Once the layout looks right, brush on a thin layer of clear-drying adhesive, one flower at a time. Test the adhesive on a scrap piece of the same paper first. It’s a small step, but it helps you catch stains or warping before you touch the final sheet.
Clear-drying options like Perfect Paper Adhesive, Mod Podge, and PVA glue tend to work well.
After the adhesive dries, add a thin clear sealer so the petals don’t start lifting at the edges. Then let the adhesive cure all the way. If the sheet will be handled a lot or sent through the mail, mount it on heavy cardstock.
How Glued Flowers Look and Feel
This method gives you a clean, planned look. Since the flowers rest on top of the paper instead of being pressed into it, they keep more of their shape, color, and fine detail. You also get full control over placement, so each petal lands exactly where you want it. That makes this a good fit when the design needs to be exact. The paper itself stays smooth, aside from the slight raised spots beneath each flower.
Writing Surface, Drying Time, and Best Uses
Write only in the open spaces. The raised flowers don’t make a good writing surface. Drying is faster than pulp paper, but the adhesive still needs time to cure before mailing or heavy handling.
This method is best for pressed flower greeting cards and bookmarks where exact flower placement matters.
Next, compare how the two methods differ in placement, texture, and writing surface.
Side-by-Side Comparison: Glue vs. Pulp
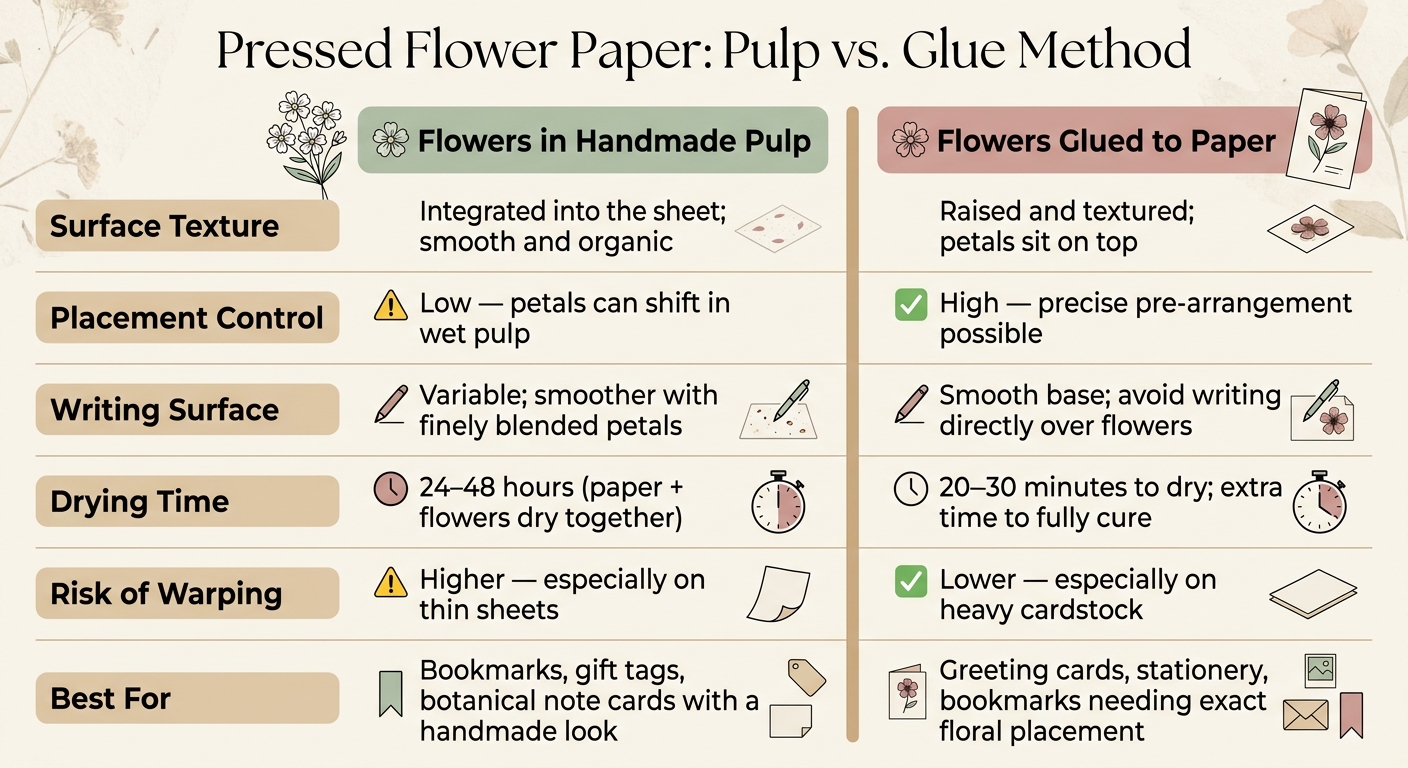
Pressed Flower Paper: Pulp vs. Glue Method Comparison
Both methods can make beautiful pressed flower paper, but they behave in very different ways. The main things to look at are placement control, drying, and how smooth the paper feels when you write on it. Success also depends on choosing and preparing flowers correctly before you begin.
Placement Control, Drying Process, and Surface Smoothness
The biggest difference comes down to control. With the glue method, you can place each petal exactly where you want it before the adhesive goes on. That makes it a good fit when layout matters. Pulp gives you less control because petals can shift around in the wet mixture.
Drying is different too. In the pulp method, the flowers and paper dry together as a single sheet. With the glue method, the paper is already done, so only the adhesive has to dry. That usually takes about 20–30 minutes, though it still needs more time to fully cure.
| Attribute | Flowers in Handmade Pulp | Flowers Glued to Finished Paper |
|---|---|---|
| Surface Texture | Part of the paper sheet; smooth and integrated | Raised and textured |
| Placement Control | Low; flowers can shift in the wet pulp | High; precise pre-arrangement is possible |
| Writing Surface | Variable; smoother when petals are finely blended | Smooth except over flowers |
| Drying Process | Paper and flowers dry together as one unit | Adhesive dries on finished paper (about 20–30 minutes) |
| Risk of Warping | Higher if the paper is thin or dries unevenly | Lower, especially with heavy cardstock |
Pulp tends to feel more like one finished sheet because the botanicals sit inside the paper itself. The glue method leaves you with a smoother base, but the petals sit on top, so you can't write straight over those spots.
Which Method Should You Choose?
The choice comes down to what you care about most.
Go with pulp if you want an integrated, handmade sheet. Choose glue if you want exact floral placement on finished paper. Put simply: pick based on priority - texture and integration or control and detail.
Use glue when you want blooms to stay recognizable and land exactly where you place them. It keeps the flower shape more intact and gives you a smoother base, which works well for stationery. If placement matters more than having the flowers built into the sheet itself, glue is the better route.
The pulp method makes more sense when making the paper is the main part of the craft. It embeds botanicals right into the sheet and gives you that natural, varied look across the page.
Key Points Before You Start
Neither method is better across the board. Match the method to the result you want: pulp for decorative handmade sheets and gifts, glue for stationery with exact placement and a smoother base.
A few things help before you dive in:
- Expect some trial and error with pulp embedding.
- Dry flowers before testing.
- Test one small sheet first so you can check drying time and texture before making a full batch.
FAQs
Which method is better for beginners?
For beginners, gluing pressed flowers onto finished paper is usually the better way to start. You have more control over where each flower goes, which makes it easier to get the look you want.
It’s also simpler and more forgiving. So instead of dealing with wet pulp, you can put your energy into arranging the design.
What flowers work best for each method?
For handmade pulp, pick botanicals that can keep their shape during blending. If you want a finer texture, blend them a bit longer. If you want more of a decorative effect, leave the botanicals whole.
If you're gluing botanicals onto finished paper, you have more options. Delicate petals, leaves, and textured weeds can all work well. A Microfleur microwave flower press can help dry flowers flat and hold their color for either method.
How do I keep pressed flower paper from warping?
When gluing pressed flowers onto finished paper, use just a tiny dab of glue. Too much moisture or adhesive can make the paper curl, and that can undo the clean look you’re after.
If the paper feels a bit flimsy, mount the finished sheet onto heavy cardstock. That extra backing gives it a sturdier base and helps it keep its shape.





















