










You can turn a wedding bouquet into a glass suncatcher if you press the flowers within 5 days, dry them until they feel papery, and seal them in a glass frame away from heat and moisture.
I’d sum it up like this: take the bouquet apart fast, pick flowers that press well, dry them in short microwave bursts of about 30 seconds and then 20-second intervals, test the layout before sealing, and choose between a floating or fixed design. Most flowers finish pressing in about 1 minute 20 seconds to 4 minutes, depending on thickness and microwave power.
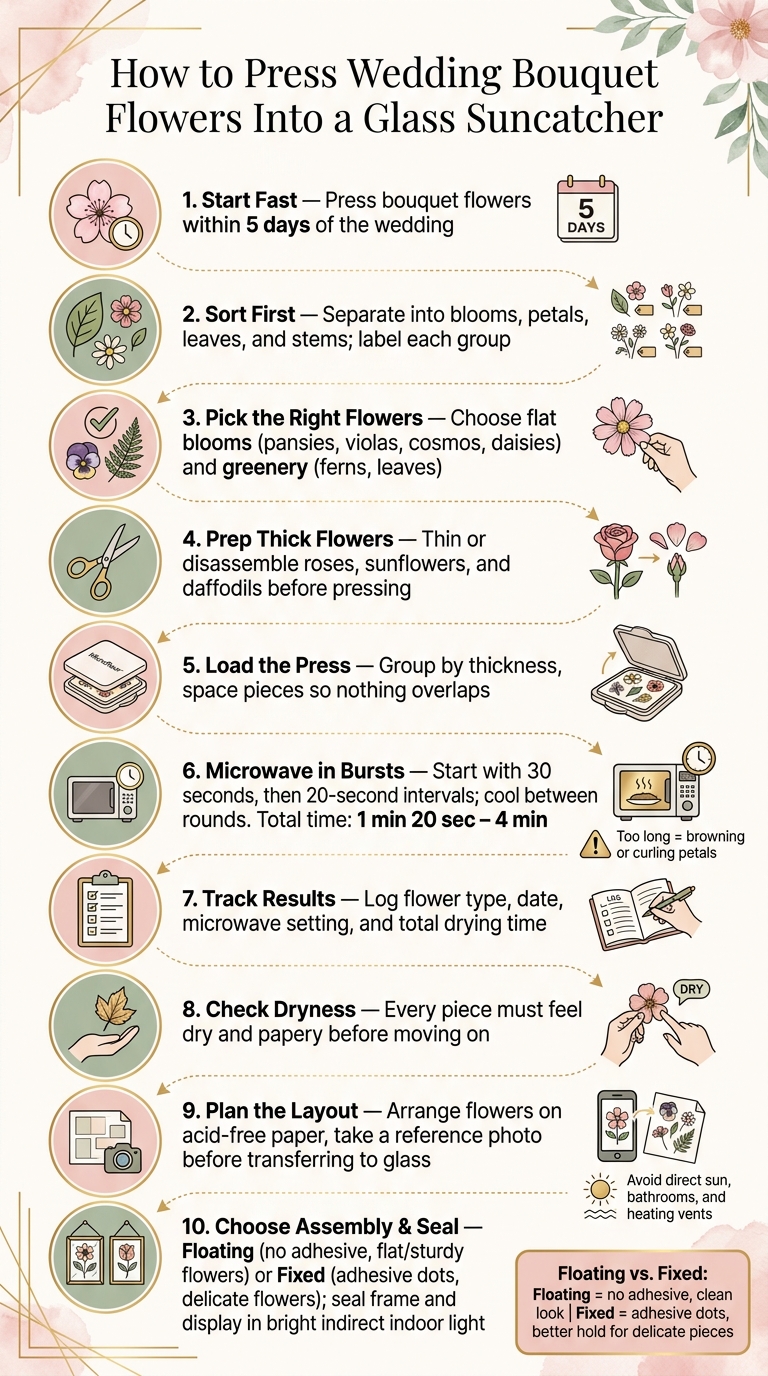
Here’s the full process at a glance:
- Start fast: press bouquet flowers within 5 days
- Sort first: group blooms, petals, leaves, and stems
- Pick the right flowers: flat blooms and greenery are easier to press
- Prep thick flowers: trim or take apart roses, sunflowers, and daffodils
- Dry with care: use short microwave rounds and cool the press between each one
- Track results: note flower type, date, setting, and drying time
- Check dryness: each piece should feel dry and papery
- Plan the design: lay flowers on paper first and take a reference photo
- Choose assembly: floating for flat, sturdy pieces; fixed for delicate ones
- Store it well: keep the finished suncatcher in bright indoor light, not direct sun
A few details make the biggest difference. White flowers can fade into pale backgrounds, so I’d test them on both light and dark surfaces first. And if petals curl or brown, that usually means the heating rounds are too long.
How to Press Wedding Bouquet Flowers Into a Glass Suncatcher
How to Make a Pressed Flower Suncatcher
sbb-itb-80d8183
Quick Comparison
| Part | Best choice | What to watch for |
|---|---|---|
| Pressing time | 30 seconds to start, then 20-second bursts | Too much heat can brown petals |
| Best flowers | Pansies, violas, cosmos, daisies, ferns, leaves | Thick blooms need prep first |
| Thick flowers | Roses, sunflowers, daffodils | Thin or separate layers |
| Assembly style | Floating for flat flowers, fixed for delicate layouts | Adhesive can shift the look if overused |
| Display spot | Bright indoor area with indirect light | Avoid sun, bathrooms, and vents |
In other words: I’d treat this like a wedding bouquet preservation project, not just a craft. The main goal is to keep the bouquet’s look, shape, and story in a form you can hang and keep.
Prepare the Bouquet and Pick Flowers That Press Well
Take the bouquet apart right away. The fresher the blooms, the better they usually press.
Set everything on a clean, flat surface and separate the bouquet into blooms, leaves, and stems. Keep each piece dry, use clean hands, and reach for tweezers when you're handling fragile parts. Pick the best-looking blooms first. If a flower is bruised or damaged, those marks tend to show once it's pressed.
The goal is simple: start with blooms that will still look clear and easy to recognize after drying.
Wedding Flowers and Greenery That Press Well
Some flowers are just easier to work with. Flatter blooms like pansies, violas, cosmos, and daisies usually press with less effort. Greenery such as ferns, evergreens, and leaves also tends to keep its shape well.
Thicker or more layered flowers, including roses, sunflowers, and daffodils, need a little prep first. Thin them out or take them apart before pressing. Flowers with a trumpet or bell shape, like tulips, usually work best when pressed from the side or cut in half.
| Flower Type | Examples | What to Do Before Pressing |
|---|---|---|
| Naturally flat | Pansies, violas, cosmos, daisies | Press as is |
| Thick/layered | Roses, sunflowers, daffodils | Thin or disassemble |
| Greenery | Ferns, evergreens, leaves | Press as is |
| Trumpet/bell-shaped | Tulips, purple bells | Press in profile or cut in half |
Once you've picked out the best flowers for pressing, label each group before drying.
Sort Petals and Stems Into Labeled Groups Before Pressing
Before you start pressing, sort the bouquet into labeled groups:
- Whole blooms
- Petals
- Leaves
- Stems
This small step saves a lot of guesswork later. When it's time to plan the suncatcher layout, you'll know exactly what each piece is.
Use a Microwave Flower Press for Faster Drying and Better Color
A microwave flower press can dry bouquet pieces in minutes. That faster drying time also helps the flowers keep more of their color.
In plain English: you can go from sorting to pressing while the bouquet still looks close to its best.
Press the Flowers and Keep a Usable Record
Once your flowers are sorted and labeled, it’s time to load the press. Group flowers with a similar thickness between the cotton liners and felt pads, clip the press evenly, and leave enough room so nothing overlaps. That spacing matters more than people think. If pieces touch, they can stick, bend, or dry unevenly.
When you microwave the press, use short bursts instead of one long run. A common place to start is 30 seconds, then 20-second intervals, letting the press cool between rounds. In most cases, total pressing time lands between 1 minute 20 seconds and 4 minutes, depending on the flower and your microwave’s power. Those notes may seem a little fussy in the moment, but they make the layout stage much easier later.
Adjust for Flower Thickness, Moisture, and Microwave Wattage
Pressing time changes based on flower thickness, moisture, and microwave wattage. Even small timing shifts can change the result. That’s why it helps to keep a notebook or digital file with the flower name, pressing date, microwave setting, and total time.
It also helps to note where each flower came from in the bouquet. If you know which blooms were the focal flowers, which sat around the edges, and which were greenery, it’s much easier to rebuild the feel of the original arrangement when you assemble the suncatcher. You’re not just drying flowers. You’re saving the shape of a memory.
Before you seal the finished suncatcher, check that every piece feels papery to the touch. If any moisture is left, it can cause trouble after sealing.
Fix Curling, Browning, Damp Centers, and Fragile Pieces
A few problems show up again and again, and each one has a pretty simple fix:
- Curling petals usually mean the heating bursts are too long. Shorten each round.
- Browning points to excess heat. Stop at once, let the press cool all the way, then continue with shorter intervals.
- Thick centers need more short bursts until they feel papery.
Once the flowers have cooled, handle them with nylon crafting tweezers so the petals don’t tear or crush. Keep going only until every piece feels papery.
Plan the Layout and Assemble the Glass Suncatcher
Cut a piece of acid-free paper to match the frame size. Then place your pressed flowers on the paper first and take a photo of the layout before you move anything onto the glass. That photo becomes your guide later, and it helps you keep the bouquet’s original shape instead of just making the design look evenly spaced.
This part matters more than people think. A wedding bouquet, memorial bouquet, or gift bouquet usually has its own rhythm. Maybe one bloom sat a little higher, or a stem curved off to one side. Try to keep that feeling. You’re not just arranging flowers. You’re saving a memory.
With the layout mapped out, the next choice is simple: do you want the flowers to float between the glass panes, or do you want them held in place?
Choose a Layout That Fits the Bouquet Memory
Use only a few key blooms so the frame stays open and airy. If you add too much, the piece can feel crowded fast.
White flowers need a little extra testing. Set them on both light and dark backgrounds and compare the contrast. Sometimes a flower that looks soft and lovely on white nearly disappears, while the same bloom stands out on a darker backing.
Assemble a Floating or Fixed Glass Suncatcher
Use the photo as your reference while you transfer each flower to the glass. Work with two glass panes and tweezers, and move one piece at a time. Slow is the name of the game here.
A floating design sandwiches the flowers between the panes with no adhesive. It gives the suncatcher a clean, airy look and works well when the blooms are flat and sturdy.
A fixed design uses small adhesive dots at the centers and stems to keep delicate pieces from shifting. This is often the better pick for flowers that are fragile or for layouts with more detail.
Here’s the basic difference:
- Floating: no adhesive, cleaner look, easier to adjust
- Fixed: small adhesive dots, better hold, helpful for fragile pieces
As you transfer the flowers, keep checking your photo so the layout stays close to the original plan. If you use adhesive, let it dry all the way. Also make sure every flower piece is fully dry before you seal the frame.
Compare Floating and Fixed Arrangements Before Sealing the Frame
Go with floating if your blooms are sturdy, flat, and easy to reposition. Go with fixed if the flowers are delicate or the layout has more moving parts and needs a firmer hold.
Once the design looks right and everything is fully dry, the frame is ready to seal.
Display, Care, and Preserve the Finished Suncatcher
Once the frame is sealed, put it somewhere light can pass through without heat or moisture. The best home for a finished suncatcher is indoors, in dry, filtered light. Keep it away from direct sun, heat, and humidity.
Display the Suncatcher in a Bright Indoor Spot
Pick a place near a bright window or glass door that gets indirect light to elevate your decor. You want the piece to glow, not bake. Skip spots with direct sun, and avoid heating vents, bathrooms, or any area where condensation tends to build up.
Add a Keepsake Label and Follow Simple Care Steps
After you choose the display spot, label the piece so the bouquet details stay connected to the keepsake. Add a back label with the couple's names, wedding date, bouquet source, and pressed date. That way, the story of the bouquet stays with the piece itself.
For care, dust the glass with a soft, dry cloth. Don’t spray liquid cleaner near the frame edges, since moisture can seep inside and damage the flowers. Every few months, take a quick look for condensation behind the glass or petals that may have shifted.
FAQs
Can I use an older wedding bouquet?
For the best results, use flowers that are still fresh. If a bloom has flaws or small cracks, those marks will usually show up after pressing too.
For pressed-flower suncatchers, fresh blooms also tend to hold their color and shape better. And if you want to preserve your wedding bouquet, process it as soon as you can to help prevent spoilage.
What flowers press best?
Naturally flat flowers are usually the easiest to press. Ferns, leaves, and evergreens tend to work especially well.
Thicker blooms like roses, ranunculus, and peonies can still be pressed, but they need a bit more prep. You can take them apart, press single petals, or remove some layers so they sit flat. Trumpet-shaped flowers can be cut or pressed from the side. For the best results, start with fresh, dry flowers with no rain or dew on them.
How do I keep pressed flowers from fading?
Once the flowers are arranged and glued in place, apply a clear acrylic sealer. That extra step helps shield them from moisture and UV rays, which can slow fading and damage.
If you're framing the piece, use UV-protective glass. It gives the flowers another layer of protection while they're on display.
For the best color retention, dry flowers with a Microfleur microwave flower press.





















